Craving a sweet treat? Try these easy no-bake Butterfinger caramel mini pies made with homemade caramel and crunchy peanuts, perfect for a quick family favorite dessert – Save for later!
Butterfinger Caramel Crunch Mini Pies 🍫 | No-Bake Dessert Magic!
Introduction
Imagine indulging in a dessert that combines the creamy richness of caramel, the crunchy sweetness of Butterfinger, and the simplicity of a no-bake recipe. Look no further than these Butterfinger Caramel Crunch Mini Pies, a dessert magic that will impress your family and friends without requiring you to be a pastry chef. With everyday ingredients and minimal effort, you can create these bite-sized treats that are perfect for any occasion. Whether you’re a fan of caramel, chocolate, or just love the idea of no-bake desserts, these mini pies are sure to satisfy your sweet tooth and leave you wanting more.
Why This Works
- Flavor balance and ingredient accessibility: The combination of caramel and Butterfinger provides a perfect balance of sweet and crunchy, while using accessible ingredients makes this dessert easy to prepare.
- Ease of preparation: This no-bake recipe simplifies the process, eliminating the need for complicated baking techniques or extensive cooking time.
- Impressive results with minimal effort: Despite its simplicity, the end result is a visually appealing and delicious dessert that looks like it came from a professional bakery.
Key Ingredients
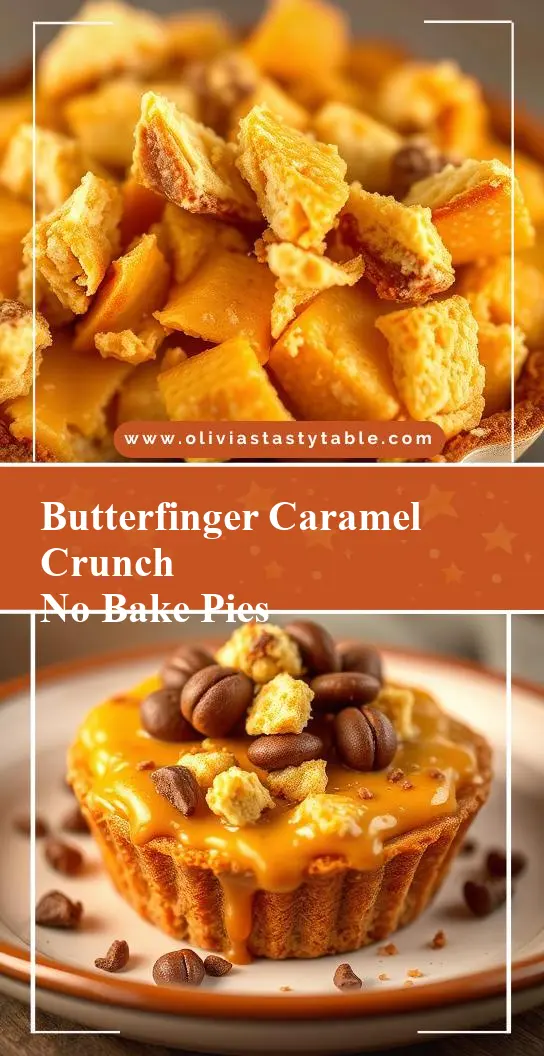
The main ingredients for these Butterfinger Caramel Crunch Mini Pies include a crust made from crushed cookies or wafers, a caramel filling made from caramel sauce, heavy cream, and butter, and topped with crushed Butterfinger bars for the crunch. You can also use chocolate chips or shavings for an extra layer of flavor. For a lighter version, consider substituting the heavy cream with a non-dairy alternative. The versatility of these ingredients allows for creative substitutions, making the recipe adaptable to various tastes and dietary needs.
Instructions
- Step 1: Begin by preparing your crust. Crush your chosen cookies or wafers in a blender or place them in a plastic bag and crush them with a rolling pin. Mix the crushed cookies with a small amount of melted butter until well combined. Press this mixture into the bottom of your mini pie molds.
- Step 2: Prepare your caramel filling. In a small saucepan, heat the caramel sauce over low heat. Add in heavy cream and butter, whisking constantly until the mixture is smooth and heated through. Be careful not to let it boil.
- Step 3: Layer your flavors. Pour the caramel mixture into the prepared pie crusts, filling them about 3/4 of the way full. Top each pie with crushed Butterfinger bars and, if desired, chocolate chips or shavings.
- Step 4: Final touches and plating. Refrigerate the pies for at least 30 minutes to allow the flavors to meld together. Serve chilled and enjoy the looks of delight on your guests’ faces as they indulge in these delicious treats.
Handy Tips
- For a firmer crust, refrigerate the pie molds for about 10 minutes before filling. This will help the crust hold its shape better.
- When heating the caramel, do it slowly and whisk constantly to prevent burning or separating.
- Experiment with different types of cookies or wafers for the crust to find your favorite flavor combination.
Heat Control
Since this is a no-bake recipe, the only heat control required is when heating the caramel sauce. It’s essential to keep the heat low and whisk constantly to ensure the caramel heats through smoothly without burning or boiling. This step is crucial for achieving a smooth and creamy filling.
Crunch Factor
The crunch in these mini pies comes from the crushed Butterfinger bars on top. To enhance the crunch, you can also add some chopped nuts or use a different crunchy candy bar. The key is to find a balance between the smooth caramel and the crunchy topping, creating a delightful texture contrast with each bite.
Pro Kitchen Tricks
- Use a variety of molds to create different shapes and sizes of pies, adding a creative touch to your presentation.
- For an extra creamy caramel, add a teaspoon of sea salt to balance the sweetness and enhance the flavor.
- Keep your caramel sauce warm by placing the saucepan over a pot of simmering water. This will make it easier to pour and ensure a smooth filling process.
Storage Tips
- Store the mini pies in an airtight container in the refrigerator for up to 5 days.
- For longer storage, consider freezing the filled pie molds before topping with Butterfinger. Simply thaw and top when ready to serve.
- When transporting, place the pies in a single layer in a covered container to prevent damage and keep them fresh.
Gift Packaging Ideas
These Butterfinger Caramel Crunch Mini Pies make perfect gifts for friends, family, or coworkers. Consider packaging them in decorative mini pie boxes or placing them in a gift basket filled with other sweet treats. You can also wrap each pie individually in plastic wrap or aluminum foil and tie with a ribbon for a more personalized touch. Adding a handwritten note or a small bag of extra crushed Butterfinger on top can make the gift even more special.
Flavor Variations
- 🌟 Different spices: Add a pinch of cinnamon or nutmeg to the caramel for a warm, spicy flavor.
- 🌟 Creative toppings: Experiment with different types of candy bars, nuts, or even dried fruits to change up the texture and flavor.
- 🌟 Ingredient swaps: Use different types of cookies for the crust or substitute the heavy cream with a non-dairy milk for a lighter version.
Troubleshooting
- Texture problems: If the caramel becomes too thick, heat it gently with a little more heavy cream. If it’s too thin, refrigerate it for a few minutes to firm up.
- Ingredient replacements: If you can’t find Butterfinger bars, consider using another crunchy candy bar like Snickers or peanut butter cups.
- Over/undercooking signs: Since this is a no-bake recipe, the main concern is the caramel. If it’s overheated, it can become too dark or develop a burnt flavor. Underheating might result in a filling that’s not smooth or fully incorporated.
FAQs
- Can I freeze it? Yes, you can freeze the filled pie molds before topping for up to 2 months. Thaw and top with Butterfinger when ready to serve.
- Is it gluten-free? Depending on the type of cookies used for the crust, this recipe can be adapted to be gluten-free. Simply choose gluten-free cookies or wafers.
- Can I double the recipe? Absolutely! Simply multiply all the ingredients by two and proceed with the instructions. Keep in mind that you might need to adjust the refrigeration time slightly for larger batches.
Conclusion
With these Butterfinger Caramel Crunch Mini Pies, you’re not just making a dessert; you’re creating an experience. The combination of smooth caramel, crunchy Butterfinger, and the simplicity of a no-bake recipe makes this a perfect treat for any occasion. Don’t be afraid to experiment with different ingredients and toppings to make the recipe your own. Share these mini pies with friends and family, and watch as they disappear in delight. Whether you’re a seasoned baker or a beginner in the kitchen, this recipe is sure to bring a smile to everyone’s face. So, go ahead, indulge in the magic of these no-bake desserts, and enjoy the joy of sharing something truly special.