Want a decadent treat made easy at home? This quick homemade dark chocolate recipe uses simple ingredients like cocoa powder and sugar to create a rich and velvety smooth chocolate perfect for any weeknight dessert, save for later and indulge in this family favorite treat tonight
Homemade Dark Chocolate
Introduction
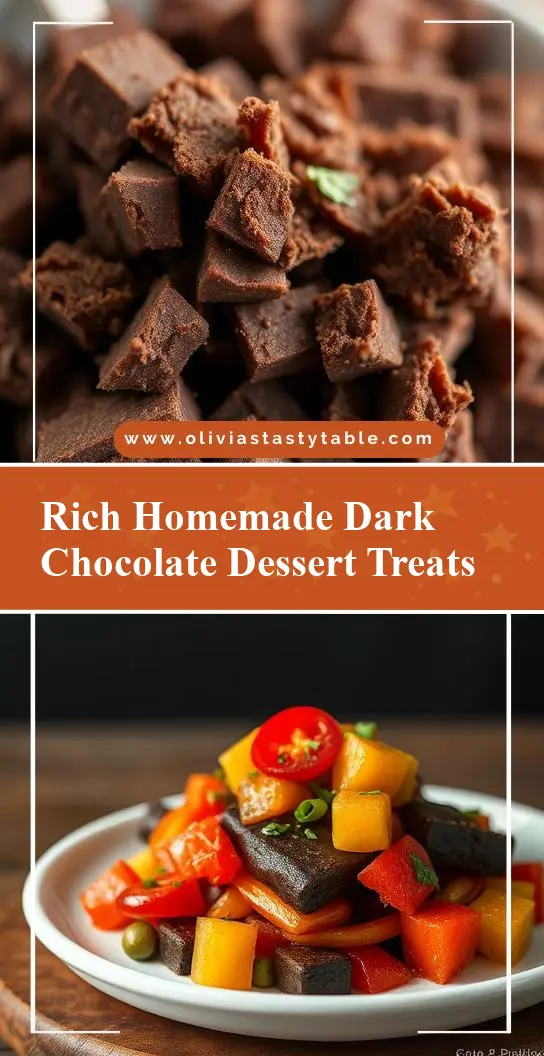
Making homemade dark chocolate is a delightful adventure that combines ease, rich flavor, and endless creativity, all using everyday ingredients that you might already have in your pantry. The process is surprisingly straightforward, allowing you to tailor your chocolate to your taste preferences, whether you like it bitterly dark or sweetly indulgent. With just a few simple steps, you can create your own signature dark chocolate at home, perfect for snacking, baking, or gifting to friends and family. This recipe not only saves you money but also lets you control the quality and ingredients, ensuring that your chocolate is free from unwanted additives and preservatives. So, let’s dive into the world of homemade dark chocolate and explore the simplicity and joy it brings to your kitchen and palate.
Why This Works
- Flavor balance and ingredient accessibility: This recipe strikes a perfect balance between bitter and sweet, using ingredients that are easily found in most grocery stores, making it accessible to anyone interested in trying their hand at making chocolate from scratch.
- Ease of preparation: The steps involved in making homemade dark chocolate are remarkably simple, requiring minimal equipment and no special chocolate-making skills, making it a fun project for beginners and experienced cooks alike.
- Impressive results with minimal effort: Despite its simplicity, the end result is incredibly impressive, yielding a rich, velvety dark chocolate that rivals store-bought varieties, perfect for impressing friends, satisfying your chocolate cravings, or using in your favorite dessert recipes.
Key Ingredients
The foundation of great homemade dark chocolate lies in its key ingredients: cocoa beans or cocoa powder, sugar, and cocoa butter. For those who prefer a dairy-free or vegan version, coconut oil or other plant-based fats can be used as a substitute for cocoa butter. The quality of these ingredients will directly impact the flavor and texture of your final product. Using high-quality cocoa beans or powder will give your chocolate a deeper, richer flavor, while the type and amount of sugar will determine the sweetness level. Additionally, vanilla or other flavorings can be added to create unique and exciting flavor profiles. Practical substitutions and variations can be explored once you’ve mastered the basic recipe, allowing you to experiment with different flavors and textures to find your perfect chocolate.
Instructions
- Step 1: Preparation is key. Start by measuring out your ingredients: cocoa powder, sugar, cocoa butter (or coconut oil for a vegan version), and any desired flavorings like vanilla. If using cocoa beans, you’ll need to roast and grind them first. Roasting can be done in a 350°F oven for about 10-15 minutes, or until fragrant, then cooled and ground into a fine powder using a food processor or grinder.
- Step 2: In a double boiler or a heat-proof bowl set over a pot of simmering water, melt the cocoa butter or coconut oil. Once melted, add in the cocoa powder, whisking constantly to avoid lumps. If using vanilla or other flavorings, now is the time to add them. Continue whisking until the mixture is smooth and well combined.
- Step 3: Gradually add the sugar to the cocoa mixture, whisking continuously. The mixture will start to thicken as the sugar dissolves. For a smoother chocolate, ensure that the sugar is fully incorporated and the mixture reaches a temperature of around 115°F to 120°F, which helps in creating a stable crystal structure.
- Step 4: Remove the mixture from the heat and let it cool slightly. Pour it into a lined or greased mold. If you’re feeling creative, now’s the time to add nuts, dried fruits, or other toppings. Let the chocolate set at room temperature or speed up the process by placing it in the refrigerator. Once set, your homemade dark chocolate is ready to be enjoyed.
Handy Tips
- Tempering your chocolate can give it a professional finish with a glossy appearance and a satisfying snap when broken. This involves heating and cooling the chocolate to create a stable crystal structure. While it’s an advanced step, it’s worth learning for the best texture and appearance.
- Experiment with different types of sugar or sweeteners to change the flavor profile of your chocolate. Honey, maple syrup, or coconut sugar can add unique twists.
- Always use high-quality ingredients for the best flavor. Fresh cocoa beans or high-quality cocoa powder will make a significant difference in the taste of your chocolate.
Heat Control
Heat control is crucial when making chocolate, as it can affect the texture and stability of the final product. Ideally, you want to melt your cocoa butter or coconut oil and dissolve your sugar at a low temperature to avoid burning the chocolate. Using a double boiler is a safe way to heat your mixture gently. If you’re tempering your chocolate, precise temperature control is necessary: the ideal working temperature for tempered chocolate is between 82°F and 90°F. Always monitor the temperature and adjust your heating source accordingly to achieve the perfect melt and set.
Crunch Factor
The texture of your homemade dark chocolate can be tailored to your liking by adding different ingredients. For a crunch, nuts like almonds or hazelnuts are excellent additions. Dried fruits can provide a chewy contrast, while espresso powder or coffee beans can add a mocha flavor and texture. If you prefer a smooth chocolate, ensure that your sugar is fully dissolved and consider adding a small amount of coconut oil or cocoa butter to enhance the mouthfeel. The key to achieving your desired texture is experimenting with different ingredients and ratios to find what works best for you.
Pro Kitchen Tricks
- For a professional finish, invest in a chocolate mold. These molds come in various shapes and sizes and can help you achieve uniform pieces of chocolate. Before pouring in your chocolate mixture, make sure the mold is clean and dry to prevent any imperfections.
- To ensure your chocolate sets evenly and doesn’t develop bloom (a white, chalky appearance), it’s crucial to cool it slowly and evenly. Avoid rapid temperature changes, and never pour warm chocolate into a cold mold.
- Keep your workspace clean and organized. Making chocolate can be messy, so having all your ingredients and tools ready will make the process smoother and more enjoyable.
Storage Tips
- Homemade dark chocolate is best stored in a cool, dry place away from direct sunlight. An airtight container in the pantry or a cupboard is ideal. If you live in a hot climate, consider storing your chocolate in the refrigerator to prevent melting, but make sure it’s well sealed to prevent absorption of other flavors.
- For longer storage, chocolate can be frozen. Wrap it tightly in plastic wrap or aluminum foil and place it in a freezer-safe bag. When you’re ready to use it, simply thaw it at room temperature or in the refrigerator.
- When storing chocolate, it’s also important to consider its shelf life. Generally, homemade dark chocolate can last for several months when stored properly. However, its quality and flavor may degrade over time, so it’s best consumed fresh for optimal taste.
Gift Packaging Ideas
Homemade dark chocolate makes a thoughtful and unique gift, especially when beautifully packaged. Consider wrapping your chocolate pieces in decorative paper or foil and placing them in a gift box or bag. A ribbon or a gift tag with a personal message can add a lovely touch. For a more rustic look, use brown paper bags, twine, and a handwritten note. If you’re gifting a larger quantity, a mason jar filled with your homemade chocolate and decorated with a ribbon around the lid can be a charming and practical way to present your gift.
Flavor Variations
- 🌟 Different spices: Add a pinch of cinnamon, nutmeg, or cayenne pepper to give your chocolate a unique twist. Spices can enhance the flavor and create interesting combinations.
- 🌟 Creative toppings: Nuts, dried fruits, and even candy pieces can be added on top of the chocolate before it sets for a fun textural element and burst of flavor.
- 🌟 Ingredient swaps: Experiment with different types of milk (almond, soy, coconut) for a non-dairy version, or use various sugars like honey or maple syrup for distinct flavor profiles.
Troubleshooting
- Texture problems: If your chocolate turns out too soft, it may be due to insufficient cooling or too much cocoa butter. Conversely, if it’s too hard, it might be over-cooled or contain too little cocoa butter. Adjusting the ratio of ingredients and cooling time can help achieve the perfect texture.
- Ingredient replacements: Always consider the flavor and texture the replacement ingredient will add. For example, using coconut sugar instead of granulated sugar will give a slightly caramel-like flavor and a softer texture.
- Over/undercooking signs: Overheating can cause the chocolate to seize up or become too thick, while underheating might result in a chocolate that doesn’t set properly. Monitor the temperature and the mixture’s consistency to avoid these issues.
FAQs
- Can I freeze it? Yes, homemade dark chocolate can be frozen for up to 6 months. Wrap it tightly and store it in a freezer-safe bag to maintain its quality.
- Is it gluten-free? Yes, the recipe as described is gluten-free, making it suitable for those with gluten intolerance or sensitivity. However, always ensure that your ingredients, especially the cocoa powder, are processed in a gluten-free environment to avoid cross-contamination.
- Can I double the recipe? Absolutely, you can double or even triple the recipe if you’re making chocolate for a larger group or as gifts. Just be sure to adjust the cooling time accordingly, as larger batches may take longer to set.
Conclusion
Making homemade dark chocolate is a rewarding experience that allows you to explore the world of flavors and textures, all from the comfort of your own kitchen. With its simplicity, adaptability, and the joy of creation, this recipe is perfect for anyone looking to indulge in rich, velvety chocolate or share a thoughtful, handmade gift. Don’t be afraid to experiment and make the recipe your own, and remember, practice makes perfect, so don’t hesitate to try again and adjust your technique until you achieve your ideal chocolate. Share your creations, experiment with new flavors, and enjoy the process of crafting something truly special and delicious.