Need a quick weeknight dinner solution? Try our easy microwave corn on the cob recipe made with fresh corn and simple ingredients for a homemade family favorite, save for later
Microwave Corn on the Cob
Introduction
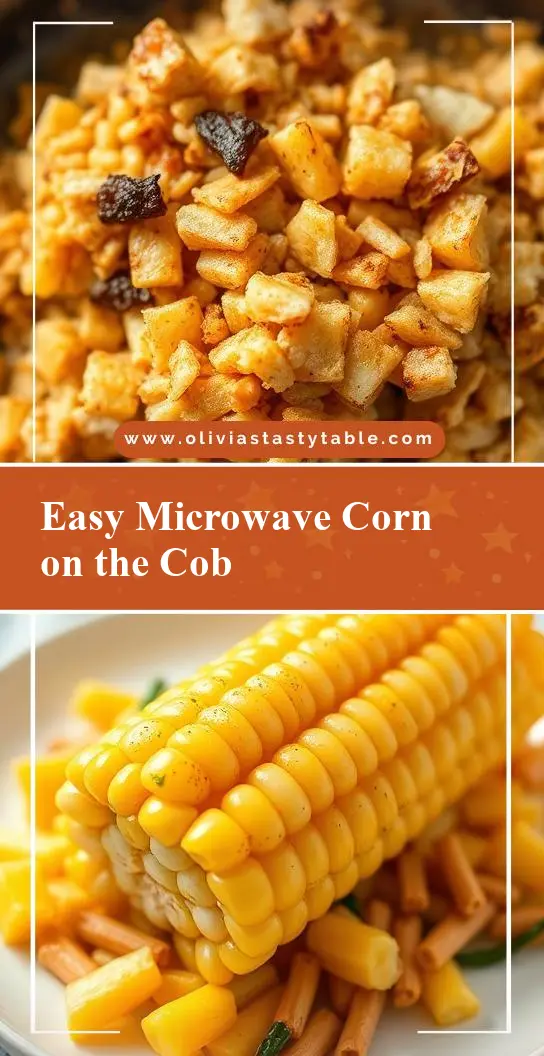
Microwave corn on the cob is a simple yet delicious way to enjoy fresh corn without the hassle of boiling or grilling. This recipe is perfect for busy weeknights or as a quick side dish for your next BBQ. With just a few everyday ingredients and a microwave, you can achieve tender, flavorful corn that’s sure to impress. The best part? It’s incredibly easy to customize with your favorite herbs, spices, and toppings, making it a versatile dish for any occasion.
Why This Works
- Flavor balance and ingredient accessibility: This recipe uses common ingredients like corn, butter, salt, and pepper, making it easy to find what you need in your local grocery store.
- Ease of preparation: The microwave does all the work, cooking the corn to perfection in just a few minutes.
- Impressive results with minimal effort: The combination of melted butter, salt, and pepper creates a rich, savory flavor that’s sure to delight your taste buds.
Key Ingredients
The main ingredients for microwave corn on the cob include fresh corn on the cob, butter, salt, and pepper. You can also add optional ingredients like garlic powder, chili powder, or grated cheese to give your corn an extra boost of flavor. For a vegan version, you can substitute the butter with a plant-based alternative like coconut oil or Earth Balance. If you don’t have fresh corn, you can also use frozen corn on the cob, just be sure to thaw it first.
Instructions
- Step 1: Begin by rinsing the corn under cold water, then gently shaking off any excess moisture. Remove the husks and silk from the corn, and place the ears on a paper towel-lined plate.
- Step 2: Dot the top of each ear of corn with butter, making sure to get both sides. Sprinkle with salt, pepper, and any desired additional seasonings.
- Step 3: Wrap each ear of corn in a damp paper towel, making sure to cover the entire ear. This will help create steam and cook the corn evenly.
- Step 4: Place the wrapped corn in the microwave and cook on high for 3-4 minutes per ear, depending on the size and your desired level of doneness. Carefully remove the corn from the microwave and let it cool for a minute or two before unwrapping and serving.
Handy Tips
- Make sure to use fresh, high-quality corn for the best flavor and texture. If using frozen corn, thaw it first and pat dry with a paper towel to remove excess moisture.
- Avoid overcooking the corn, as it can become tough and dry. If you prefer your corn more tender, cook for an additional 30 seconds to 1 minute.
- Experiment with different seasonings and toppings, such as grated cheese, diced herbs, or a sprinkle of smoked paprika, to give your corn a unique flavor.
Heat Control
When cooking corn in the microwave, it’s essential to monitor the heat and adjust the cooking time as needed. The ideal cooking time will depend on the size of the corn and your personal preference for doneness. As a general rule, cook for 3-4 minutes per ear, then check for doneness by carefully unwrapping the corn and checking the kernels. If they’re still slightly firm, return to the microwave for an additional 30 seconds to 1 minute.
Crunch Factor
The crunch factor of microwave corn on the cob will depend on the cooking time and the freshness of the corn. If you prefer your corn more tender, cook for an additional 30 seconds to 1 minute. For a crunchier texture, cook for 2-3 minutes per ear, then check for doneness. You can also try cooking the corn with the husks still on, which will help retain moisture and create a slightly crunchier texture.
Pro Kitchen Tricks
- Use a microwave-safe dish or plate to cook the corn, as this will help contain any spills or messes.
- Experiment with different cooking times and seasonings to find your perfect combination.
- Consider using a corn holder or microwave-safe corn cooker to make cooking and serving easier.
Storage Tips
- Leftover cooked corn can be stored in an airtight container in the refrigerator for up to 3 days.
- To reheat, simply wrap the corn in a damp paper towel and microwave for 20-30 seconds, or until warmed through.
- For longer-term storage, consider freezing cooked corn in airtight containers or freezer bags, then reheating as needed.
Gift Packaging Ideas
If you’re looking to give microwave corn on the cob as a gift, consider packaging it in a decorative basket or container with a few complementary items, such as a pat of butter, a sprinkle of seasoning, or a few fresh herbs. You could also include a recipe card or instructions for cooking the corn, making it a thoughtful and easy-to-use gift for friends and family.
Flavor Variations
- 🌟 Try adding a sprinkle of smoked paprika or chili powder for a spicy kick.
- 🌟 Experiment with different types of butter, such as garlic butter or herb butter, for added flavor.
- 🌟 Consider adding a squeeze of fresh lime juice or a sprinkle of grated cheese for a burst of citrus flavor.
Troubleshooting
- Texture problems: If your corn is too tough or dry, try adjusting the cooking time or using a different type of corn.
- Ingredient replacements: If you don’t have butter, try using a plant-based alternative or a drizzle of olive oil.
- Over/undercooking signs: If your corn is overcooked, it will be dry and tough. If it’s undercooked, the kernels will still be slightly firm. Adjust the cooking time as needed to achieve your desired level of doneness.
FAQs
- Can I freeze it? Yes, cooked corn can be frozen in airtight containers or freezer bags, then reheated as needed.
- Is it gluten-free? Yes, this recipe is naturally gluten-free, making it a great option for those with dietary restrictions.
- Can I double the recipe? Yes, simply multiply the ingredients and cooking time as needed to cook larger quantities of corn.
Conclusion
Microwave corn on the cob is a simple, delicious, and versatile dish that’s perfect for any occasion. With its ease of preparation, impressive results, and endless possibilities for customization, it’s a great addition to any meal or gathering. Whether you’re a busy weeknight cook or a seasoned chef, this recipe is sure to become a favorite. So go ahead, give it a try, and enjoy the sweet, tender flavor of perfectly cooked corn on the cob!