Craving a warm weeknight dinner solution? This easy coconut chicken chili is a quick homemade favorite made with shredded chicken and coconut milk, perfect for a family dinner. Save for later and try it tonight
Coconut Chicken Chili
Introduction
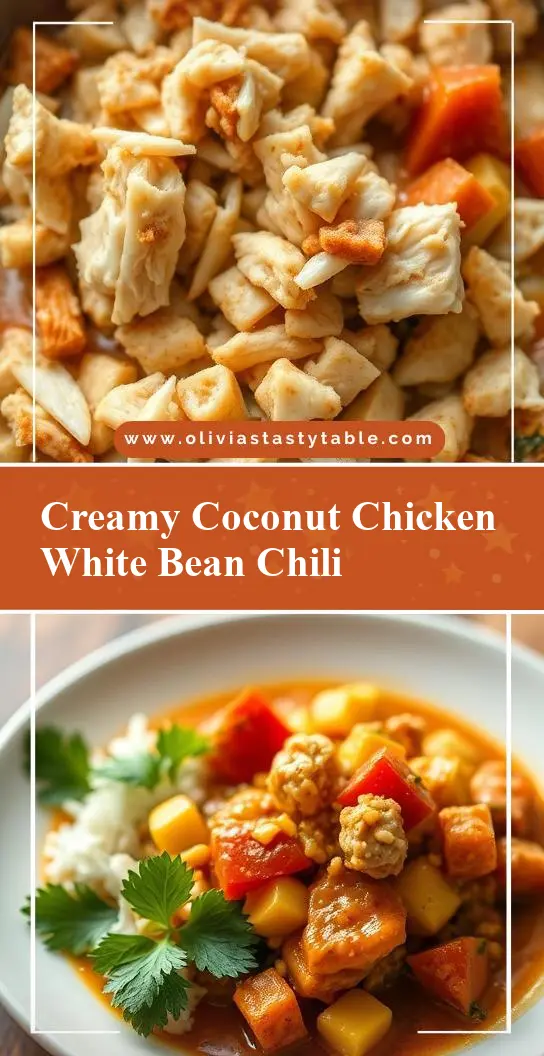
Imagine a dish that combines the richness of coconut, the savory flavor of chicken, and the warmth of chili, all in one delicious and easy-to-make recipe. Our Coconut Chicken Chili is a perfect blend of flavors and textures that will leave you wanting more. This recipe is not only a treat for your taste buds, but it’s also incredibly easy to make, requiring minimal effort and using everyday ingredients that you likely have in your pantry. Whether you’re a busy weeknight cook or an adventurous weekend chef, this recipe is sure to become a staple in your kitchen.
Why This Works
- Flavor balance and ingredient accessibility: The combination of coconut milk, chicken, and chili peppers creates a harmonious balance of flavors that is both familiar and exciting. Plus, all the ingredients are easily found in most supermarkets.
- Ease of preparation: This recipe requires minimal prep time and can be cooked in under 30 minutes, making it perfect for a quick dinner or lunch.
- Impressive results with minimal effort: Despite its simplicity, this recipe yields impressive results that are sure to wow your family and friends. The coconut milk adds a rich and creamy texture, while the chicken and chili peppers provide plenty of protein and flavor.
Key Ingredients
The key ingredients in this recipe include boneless, skinless chicken breasts, coconut milk, diced bell peppers, onions, garlic, and chili peppers. You can also customize the recipe to your taste by adding your favorite spices or toppings. For example, you can use ground cumin, smoked paprika, or diced jalapenos to add extra flavor. If you don’t have coconut milk, you can substitute it with Greek yogurt or sour cream, although the flavor and texture will be slightly different.
Instructions
- Step 1: Begin by chopping the onions, bell peppers, and chili peppers. Heat a tablespoon of olive oil in a large pan over medium-high heat. Add the chopped onions and cook until they are translucent, about 3-4 minutes.
- Step 2: Add the diced bell peppers and chili peppers to the pan and cook for an additional 2-3 minutes, until they start to soften. Add the minced garlic and cook for 1 minute, until fragrant.
- Step 3: Add the chicken breasts to the pan and cook until they are browned on both sides and cooked through, about 5-6 minutes. Remove the chicken from the pan and set it aside. Add the coconut milk to the pan and stir to combine with the onion and pepper mixture. Bring the mixture to a simmer and let it cook for 2-3 minutes, until it has thickened slightly.
- Step 4: Return the chicken to the pan and stir to combine with the coconut milk mixture. Season with salt, pepper, and any additional spices you like. Serve the chili hot, garnished with chopped fresh cilantro or scallions, if desired.
Handy Tips
- Make sure to use full-fat coconut milk for the best flavor and texture. You can also use low-fat coconut milk if you prefer a lighter version.
- Don’t overcook the chicken or the vegetables, as this can make them tough and dry. Cook the chicken until it is just cooked through, and the vegetables until they are tender but still crisp.
- Customize the recipe to your taste by adding your favorite spices or toppings. Some ideas include diced tomatoes, shredded cheese, sour cream, or diced avocado.
Heat Control
When cooking the chili, make sure to adjust the heat to your desired level of spiciness. If you like a mild chili, you can use just one chili pepper or omit the seeds and membranes, which contain most of the heat. If you like a spicier chili, you can add more chili peppers or use hot sauce to taste. The ideal temperature for cooking the chili is medium-high heat, which will help to brown the chicken and cook the vegetables quickly. Cook the chili for 20-25 minutes, or until the chicken is cooked through and the vegetables are tender.
Crunch Factor
The crunch factor in this recipe comes from the diced bell peppers and onions, which add a nice texture contrast to the soft chicken and coconut milk. You can also add other crunchy ingredients, such as chopped nuts or seeds, to the chili for extra texture. To achieve the perfect crunch, make sure to not overcook the vegetables, as this can make them soft and mushy. Cook the vegetables until they are tender but still crisp, and then add them to the chili.
Pro Kitchen Tricks
- Use a large pan to cook the chili, as this will help to prevent the ingredients from steaming instead of browning. A large pan will also give you enough room to stir and combine the ingredients easily.
- Don’t stir the chili too much, as this can break down the ingredients and make them mushy. Stir the chili just enough to combine the ingredients and prevent burning.
- Let the chili rest for a few minutes before serving, as this will help the flavors to meld together and the ingredients to thicken. You can also refrigerate or freeze the chili for later use, which will help to intensify the flavors and textures.
Storage Tips
- Let the chili cool completely before refrigerating or freezing it. This will help to prevent the growth of bacteria and other microorganisms that can cause foodborne illness.
- Refrigerate the chili for up to 3 days, or freeze it for up to 3 months. When reheating the chili, make sure to heat it to an internal temperature of 165°F (74°C) to ensure food safety.
- Use airtight containers to store the chili, such as glass or plastic containers with tight-fitting lids. This will help to prevent the chili from drying out or absorbing odors from other foods.
Gift Packaging Ideas
If you want to give the Coconut Chicken Chili as a gift, you can package it in a variety of ways. One idea is to fill a large glass jar with the chili and top it with a layer of chopped fresh cilantro or scallions. You can also add a few crusty bread rolls or a side of rice to the gift, which will help to round out the meal. Another idea is to package the chili in individual portions, such as small glass containers or freezer bags, which can be easily reheated and served. Whatever packaging you choose, make sure to include a gift tag or card with the recipe and any relevant cooking instructions.
Flavor Variations
- 🌟 Different spices: You can customize the recipe by adding your favorite spices or herbs, such as cumin, smoked paprika, or dried oregano. Experiment with different combinations to find the flavor you like best.
- 🌟 Creative toppings: Add some extra flavor and texture to the chili by topping it with chopped fresh cilantro, scallions, or avocado. You can also use shredded cheese, sour cream, or diced tomatoes to add extra creaminess and flavor.
- 🌟 Ingredient swaps: Swap out the chicken for other proteins, such as ground beef or turkey, or use vegetarian options like black beans or roasted sweet potatoes. You can also use different types of milk, such as almond or soy milk, to create a non-dairy version of the recipe.
Troubleshooting
- Texture problems: If the chili is too thick, you can thin it out with a little water or broth. If it’s too thin, you can simmer it for a few minutes to reduce the liquid and thicken the chili.
- Ingredient replacements: If you don’t have a particular ingredient, you can often substitute it with something else. For example, you can use diced tomatoes instead of fresh tomatoes, or ground cumin instead of smoked paprika.
- Over/undercooking signs: Make sure to cook the chicken until it’s just cooked through, and the vegetables until they’re tender but still crisp. If you overcook the chili, it can become dry and tough, while undercooking can leave the ingredients raw and unappetizing.
FAQs
- Can I freeze it? Yes, you can freeze the Coconut Chicken Chili for up to 3 months. Simply let it cool completely, then transfer it to an airtight container or freezer bag and store it in the freezer. When you’re ready to eat it, simply thaw the chili overnight in the refrigerator, then reheat it to an internal temperature of 165°F (74°C).
- Is it gluten-free? Yes, this recipe is gluten-free, as long as you use gluten-free spices and ingredients. Make sure to check the labels of any store-bought ingredients, such as broth or coconut milk, to ensure they are gluten-free.
- Can I double the recipe? Yes, you can easily double or triple the recipe if you need to feed a larger crowd. Simply multiply the ingredients and cook the chili in a larger pan or Dutch oven. Keep in mind that you may need to adjust the cooking time slightly, as a larger batch of chili can take longer to cook.
Conclusion
In conclusion, the Coconut Chicken Chili is a delicious and easy-to-make recipe that’s perfect for any occasion. With its rich and creamy texture, bold flavors, and customizable ingredients, this recipe is sure to become a staple in your kitchen. Whether you’re a busy weeknight cook or an adventurous weekend chef, this recipe is a great way to add some excitement to your meal routine. So go ahead, give it a try, and enjoy the delicious flavors and textures of this amazing dish! Don’t forget to share your creations with friends and family, and experiment with different ingredients and spices to make the recipe your own.