Craving a classic dessert? Mama’s Banana Pudding is a quick and easy homemade treat made with ripe bananas and creamy vanilla pudding, perfect for a weeknight dinner. Save for later and enjoy this family favorite recipe tonight.
Mama’s Banana Pudding
Introduction
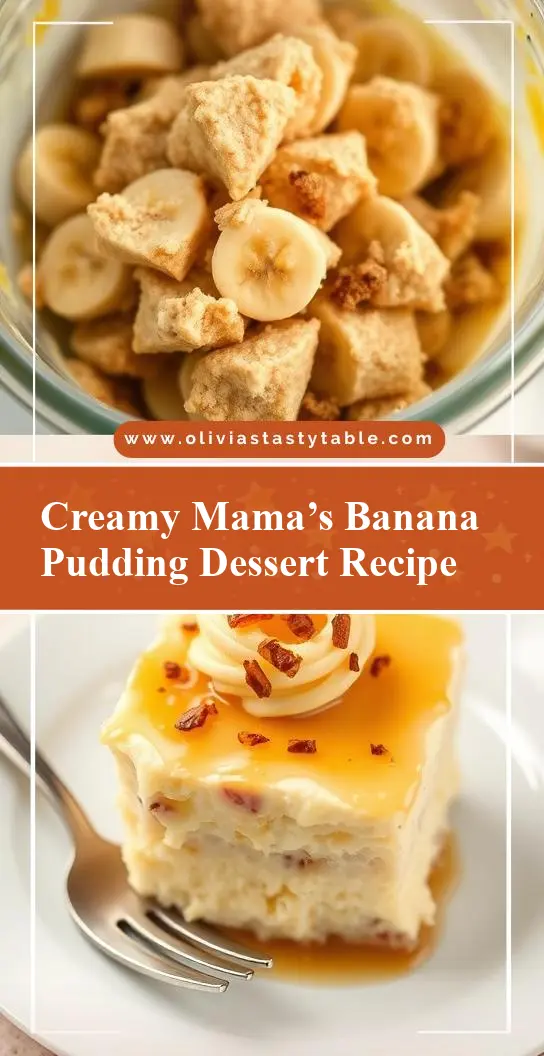
Mama’s Banana Pudding is a classic dessert that combines the natural sweetness of bananas with the richness of vanilla pudding, all layered with a crunchy Nilla wafer crust. This recipe is a staple of comfort food, requiring minimal effort for a dish that’s both impressive in its simplicity and satisfying to the taste buds. By using everyday ingredients, you can create a masterpiece that will leave everyone asking for the secret behind its irresistible flavor and texture. Whether you’re a seasoned baker or a beginner in the kitchen, Mama’s Banana Pudding is an accessible and delightful treat that’s sure to become a family favorite.
Why This Works
- Flavor balance and ingredient accessibility: The combination of ripe bananas, vanilla pudding, and Nilla wafers creates a perfect harmony of flavors and textures that are easily found in most grocery stores.
- Ease of preparation: The steps involved in making Mama’s Banana Pudding are straightforward and require no advanced culinary techniques, making it a great option for beginners or those looking for a quick dessert.
- Impressive results with minimal effort: Despite its simplicity, the layered presentation and variety of textures give Mama’s Banana Pudding a sophisticated look that belies the ease of its preparation, perfect for serving at gatherings or special occasions.
Key Ingredients
The main ingredients in Mama’s Banana Pudding include ripe bananas for natural sweetness, a package of vanilla pudding mix for convenience and a consistent flavor, Nilla wafers for the crunchy crust, heavy cream and milk for a rich and creamy pudding, and a touch of sugar to balance out the flavors. Practical substitutions can be made for those with dietary restrictions, such as using almond milk or a non-dairy creamer for a lactose-free version, or opting for gluten-free Nilla wafers for those with gluten intolerance. Additionally, for a healthier twist, you can reduce the amount of added sugar or use natural sweeteners like honey or maple syrup.
Instructions
- Step 1: Begin by preparing your ingredients. Slice the bananas into coins, crush the Nilla wafers for the crust, and measure out the vanilla pudding mix, heavy cream, milk, and sugar. This step ensures that everything is ready to go as you start assembling the pudding.
- Step 2: Cook the vanilla pudding according to the package instructions using the heavy cream, milk, and sugar. Allow the pudding to cool slightly before using it. This step is crucial for achieving the right consistency and flavor for the pudding.
- Step 3: Layer the ingredients in a large serving dish or individual cups. Start with a layer of Nilla wafer crumbs, followed by a layer of sliced bananas, and then a layer of the vanilla pudding. Repeat this process until all the ingredients are used, ending with a layer of pudding on top. This layering technique gives Mama’s Banana Pudding its signature look and ensures every bite includes a mix of textures and flavors.
- Step 4: For the final touches, you can garnish the top of the pudding with additional Nilla wafers or a sprinkle of nutmeg. Refrigerate the pudding for at least 30 minutes to allow the flavors to meld together and the pudding to set. This step is important for achieving the best flavor and texture.
Handy Tips
- Use very ripe bananas for the best flavor. If your bananas are not ripe enough, you can speed up the ripening process by placing them in a paper bag with an apple or avocado.
- Avoid overmixing the pudding, as this can lead to a sticky or too-thick consistency. Stop mixing once the ingredients are just combined.
- For a lighter version, you can use less sugar or substitute some of the heavy cream with half-and-half or a non-dairy alternative.
Heat Control
When cooking the vanilla pudding, it’s essential to follow the package instructions for the correct temperature and cooking time. Generally, you’ll want to cook the pudding over medium heat, stirring constantly, until it comes to a boil. Then, reduce the heat to low and simmer for 2 minutes, or until the pudding thickens. Be careful not to overcook, as this can cause the pudding to become too thick or even scramble. The ideal doneness is when! the pudding coats the back of a spoon evenly and has a smooth, creamy texture.
Crunch Factor
The crunch factor in Mama’s Banana Pudding comes from the Nilla wafer crust and any additional wafers used for garnish. To achieve the perfect crunch, make sure to crush the Nilla wafers just before using them, as they can become stale quickly. You can also experiment with other crunchy elements like chopped nuts or a sprinkle of cookie crumbs on top of the pudding for added texture.
Pro Kitchen Tricks
- For an extra creamy pudding, chill it in the refrigerator for a few hours before serving. This allows the flavors to meld together and the pudding to set properly.
- Use high-quality vanilla extract for the best flavor. A good vanilla can elevate the entire dish and give it a more complex taste profile.
- To prevent the bananas from browning, sprinkle them with a bit of lemon juice after slicing. This will help preserve their color and freshness.
Storage Tips
- Mama’s Banana Pudding is best served fresh, but it can be stored in the refrigerator for up to 24 hours. Cover the dish with plastic wrap or aluminum foil to prevent it from drying out.
- For longer storage, you can prepare the components separately and assemble the pudding just before serving. The vanilla pudding and Nilla wafer crust can be made ahead of time and stored in separate containers in the refrigerator.
- Avoid freezing the assembled pudding, as the texture of the bananas and pudding can become unpleasant. However, you can freeze the vanilla pudding on its own for up to 2 months and thaw it when needed.
Gift Packaging Ideas
Mama’s Banana Pudding can be a thoughtful and delicious gift for friends, family, or coworkers. Consider packaging it in individual Mason jars or small glass containers with a ribbon and a gift tag. You can also include a packet of Nilla wafers on the side for them to use as a topping. For a more rustic look, wrap the container in a piece of burlap or a linen cloth and tie it with twine. This adds a charming, homemade touch to the presentation.
Flavor Variations
- 🌟 Different spices: Add a pinch of cinnamon, nutmeg, or cardamom to the vanilla pudding for a unique twist on the classic flavor.
- 🌟 Creative toppings: Experiment with different toppings such as caramel sauce, whipped cream, chopped nuts, or even a sprinkle of sea salt to add texture and flavor contrast.
- 🌟 Ingredient swaps: Replace the vanilla pudding with a different flavor like chocolate or butterscotch for a completely new dessert. You can also use different types of cookies or wafers for the crust, such as chocolate sandwich cookies or peanut butter wafers.
Troubleshooting
- Texture problems: If the pudding turns out too thick, you can thin it out with a bit of milk or cream. If it’s too thin, you can cook it for a few more minutes or add a little more pudding mix.
- Ingredient replacements: If you’re out of a particular ingredient, don’t be afraid to get creative with substitutions. For example, you can use almond milk instead of regular milk or honey instead of sugar.
- Over/undercooking signs: Keep an eye on the pudding as it cooks, and remove it from the heat as soon as it thickens. If you notice it starting to scramble or become too thick, you can try whisking in a bit of cold milk to rescue it.
FAQs
- Can I freeze it? While it’s not recommended to freeze the assembled pudding, you can freeze the vanilla pudding on its own for up to 2 months. Thaw it in the refrigerator overnight and assemble the pudding just before serving.
- Is it gluten-free? Mama’s Banana Pudding can be made gluten-free by using gluten-free Nilla wafers or substituting them with a gluten-free alternative. Be sure to check the ingredients of the vanilla pudding mix as well to ensure it’s gluten-free.
- Can I double the recipe? Yes, you can easily double or triple the recipe to serve a larger crowd. Just keep in mind that you’ll need to adjust the cooking time slightly if you’re making a larger batch of pudding.
Conclusion
Mama’s Banana Pudding is a timeless dessert that’s sure to please both kids and adults alike. With its creamy vanilla pudding, sweet bananas, and crunchy Nilla wafer crust, it’s a treat that’s both comforting and elegant. Whether you’re serving it at a family dinner, a potluck, or a special occasion, this pudding is sure to be a hit. Don’t be afraid to experiment with different flavors and toppings to make it your own, and enjoy the process of creating something delicious and memorable. Happy cooking!