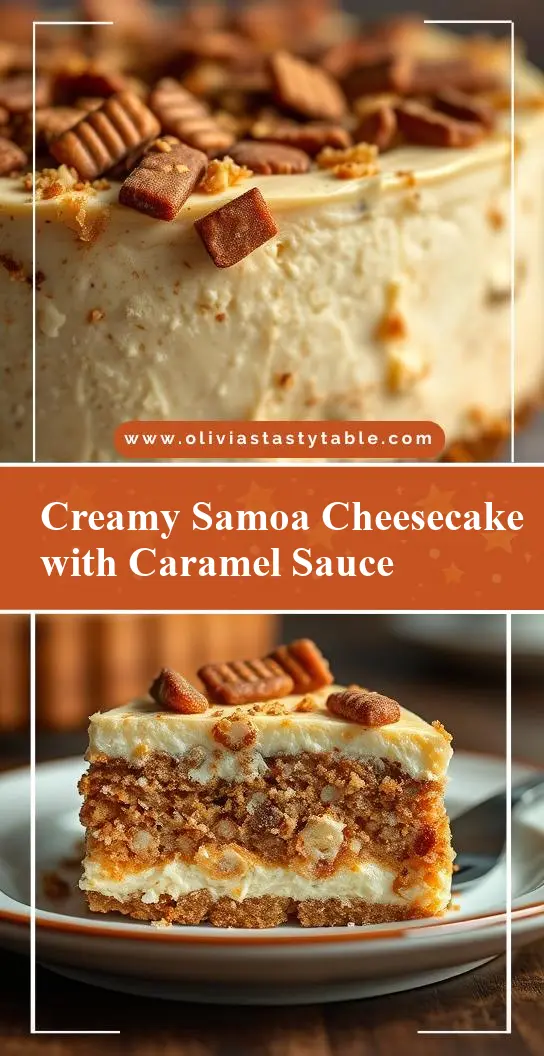
Craving a decadent dessert? This easy Samoa cheesecake is a homemade twist on the classic Girl Scout cookie, featuring caramel, chocolate, and toasted coconut. Save for later and indulge in this family favorite tonight.
Samoa Cheesecake
Introduction
Imagine a dessert that combines the richness of cheesecake, the crunch of caramelized cookies, and the deep flavor of chocolate and coconut – a true delight for the senses. The Samoa Cheesecake is a creative twist on traditional cheesecakes, incorporating the beloved flavors of the Girl Scout cookie, Samoa, into a creamy, dreamy dessert. This recipe is perfect for those looking to impress their friends and family with a unique dessert that’s both easy to make and packed with flavor. Using everyday ingredients, you can create a masterpiece that will be the talk of any gathering. The best part? It’s surprisingly easy to prepare, making it accessible to bakers of all skill levels.
Why This Works
- Flavor balance and ingredient accessibility: This recipe strikes a perfect balance between the richness of the cheesecake, the sweetness of the caramel, and the savory depth of the chocolate and coconut, all while using ingredients that are easily found in most grocery stores.
- Ease of preparation: Despite its impressive appearance and complex flavors, the Samoa Cheesecake is relatively simple to prepare. The steps are straightforward, and each component can be made ahead of time, making it a great option for busy bakers.
- Impressive results with minimal effort: The combination of textures and flavors in this cheesecake – from the crunchy cookie crust to the smooth cheesecake and the gooey caramel topping – creates a dessert that is sure to impress, without requiring excessive time or effort.
Key Ingredients
The Samoa Cheesecake relies on several key ingredients to achieve its distinctive flavor and texture. These include a crust made from crushed Samoa cookies, a cheesecake filling that incorporates coconut and caramel for added depth, and a topping of melted chocolate, toasted coconut flakes, and a drizzle of caramel sauce. For the crust, you’ll need Samoa cookies, melted butter, and a pinch of salt. The cheesecake filling requires cream cheese, granulated sugar, eggs, vanilla extract, shredded coconut, and caramel sauce. Finally, for the topping, you’ll need chocolate chips, heavy cream, toasted coconut flakes, and additional caramel sauce for drizzling. Practical substitutions can be made for some ingredients, such as using different types of cookies for the crust or swapping out the heavy cream for a non-dairy alternative, allowing for flexibility based on dietary needs and preferences.
Instructions
- Step 1: Begin by preparing your crust. Crush the Samoa cookies in a food processor until they are finely ground. Mix the crushed cookies with melted butter and a pinch of salt until well combined. Press this mixture into the bottom of a springform pan. Bake the crust in a preheated oven at 350°F for about 10 minutes, or until it is lightly browned. Let it cool completely.
- Step 2: Next, prepare the cheesecake filling. In a large mixing bowl, beat the cream cheese until it is smooth. Add the granulated sugar and beat until combined. Beat in the eggs one at a time, followed by the vanilla extract. Stir in the shredded coconut and caramel sauce. Pour the cheesecake batter into the prepared pan over the cooled crust. Bake the cheesecake in a preheated oven at 325°F for about 50-60 minutes, or until the edges are set and the center is just slightly jiggly. Let it cool completely in the pan.
- Step 3: While the cheesecake is cooling, prepare the topping. Melt the chocolate chips in a double boiler or in the microwave in 30-second increments, stirring between each interval until smooth. Stir in the heavy cream until well combined. Once the cheesecake has cooled, drizzle the melted chocolate over the top. Sprinkle toasted coconut flakes over the chocolate. Drizzle with additional caramel sauce to taste.
- Step 4: Finally, refrigerate the cheesecake for at least 4 hours or overnight to allow the flavors to meld together. When you’re ready to serve, remove the cheesecake from the refrigerator about 30 minutes before slicing to allow it to come to room temperature slightly. This will make it easier to slice and serve.
Handy Tips
- One of the most helpful tips for making a successful cheesecake is to ensure that all of your ingredients are at room temperature before you start mixing. This will help the cheesecake batter to come together smoothly and evenly, reducing the risk of cracks or uneven baking.
- Another tip is to not overmix the batter. Mix the ingredients just until they are combined, and then stop mixing. Overmixing can lead to a dense cheesecake.
- For the caramel sauce, you can make your own by melting sugar in a saucepan over low heat, stirring constantly, or you can use store-bought caramel sauce for convenience.
Heat Control
Heat control is crucial when baking a cheesecake to prevent it from cracking or cooking unevenly. The ideal temperature for baking a cheesecake is between 325°F to 350°F. It’s also important to not overbake the cheesecake. A perfectly baked cheesecake will be slightly jiggly in the center when you shake the pan gently. If you’re unsure, it’s better to err on the side of underbaking slightly, as the cheesecake will continue to set as it cools.
Crunch Factor
The crunch factor in the Samoa Cheesecake comes from the toasted coconut flakes and the crunchy cookie crust. To achieve the perfect crunch, make sure to toast the coconut flakes in a 350°F oven for about 5-7 minutes, or until they are lightly browned and fragrant, stirring frequently to prevent burning. For the cookie crust, baking it until it is lightly browned will help it retain its crunch.
Pro Kitchen Tricks
- One pro kitchen trick for ensuring a smooth cheesecake is to use a water bath. This involves placing the springform pan in a larger pan filled with hot water, which helps to cook the cheesecake evenly and prevents cracking.
- Another trick is to let the cheesecake cool completely in the pan before refrigerating it. This gradual cooling process helps prevent sudden changes in temperature, which can cause the cheesecake to crack.
- For a clean slice, dip your knife in hot water and wipe it dry before slicing the cheesecake. This will help the knife glide through the cheesecake smoothly, giving you a clean, even slice.
Storage Tips
- The Samoa Cheesecake can be stored in the refrigerator for up to 5 days. It’s best to store it in an airtight container to keep it fresh.
- For longer storage, the cheesecake can be frozen. Wrap it tightly in plastic wrap or aluminum foil and place it in a freezer-safe bag. Frozen cheesecake will keep for up to 2 months. When you’re ready to serve, thaw it overnight in the refrigerator.
- When reheating, it’s best to let the cheesecake come to room temperature or warm it up slightly in the microwave. Be careful not to overheat, as this can cause the cheesecake to become too soft or the chocolate to melt unevenly.
Gift Packaging Ideas
The Samoa Cheesecake makes a wonderful gift, especially for those with a sweet tooth. Consider packaging it in a decorative tin or on a platter, wrapped in plastic wrap or aluminum foil and tied with a ribbon. You could also include a side of caramel sauce or whipped cream for an extra-special touch. For a more rustic look, you could wrap slices of the cheesecake in parchment paper and twine, perfect for a dessert buffet or as a take-home treat for dinner guests.
Flavor Variations
- 🌟 Different spices: Consider adding a pinch of salt or a teaspoon of vanilla extract to the cheesecake batter for added depth of flavor.
- 🌟 Creative toppings: In addition to the chocolate, coconut, and caramel, you could top your cheesecake with chopped nuts, dried fruit, or even candy pieces for a fun twist.
- 🌟 Ingredient swaps: For a gluten-free version, you could use gluten-free cookies for the crust. For a non-dairy version, consider swapping out the heavy cream for a non-dairy milk alternative and using vegan chocolate chips.
Troubleshooting
- Texture problems: If your cheesecake turns out too dense, it may be due to overmixing the batter. If it’s too soft, it might not have baked long enough. Adjust your mixing and baking times accordingly for future attempts.
- Ingredient replacements: If you can’t find Samoa cookies, you could substitute with a similar type of cookie that has a caramel and coconut flavor profile. For the cheesecake filling, ensure that all ingredients are at room temperature and mix them just until combined to avoid a dense cheesecake.
- Over/undercooking signs: Keep an eye on your cheesecake while it bakes. If the edges start to brown too quickly, you can cover the pan with foil to prevent overbrowning. If the cheesecake is still very jiggly after the recommended baking time, it may need a few more minutes in the oven.
FAQs
- Can I freeze it? Yes, the Samoa Cheesecake can be frozen for up to 2 months. Wrap it tightly and place it in a freezer-safe bag. Thaw overnight in the refrigerator when you’re ready to serve.
- Is it gluten-free? The original recipe includes Samoa cookies, which contain gluten. However, you can make a gluten-free version by using gluten-free cookies for the crust.
- Can I double the recipe? Yes, you can double the recipe to make a larger cheesecake. Just keep in mind that you’ll need to adjust the baking time accordingly. A larger cheesecake will take longer to bake through.
Conclusion
Creating a Samoa Cheesecake is a fun and rewarding baking project that’s sure to delight both kids and adults. With its unique combination of flavors and textures, it’s perfect for special occasions or as a treat any time of the year. Don’t be afraid to experiment with different toppings or ingredient swaps to make the recipe your own. Whether you’re a seasoned baker or just starting out, this cheesecake is a great way to challenge yourself and impress your friends and family. So go ahead, get baking, and enjoy the ooohs and ahhhs as you serve this stunning dessert!