Looking for a showstopping dessert to impress your family and friends? This easy homemade raspberry layer cake recipe is a quick and delicious family favorite made with fresh raspberries and moist cake layers, save for later and try it tonight
“Decadent Raspberry Layer Cake Recipe”
Introduction
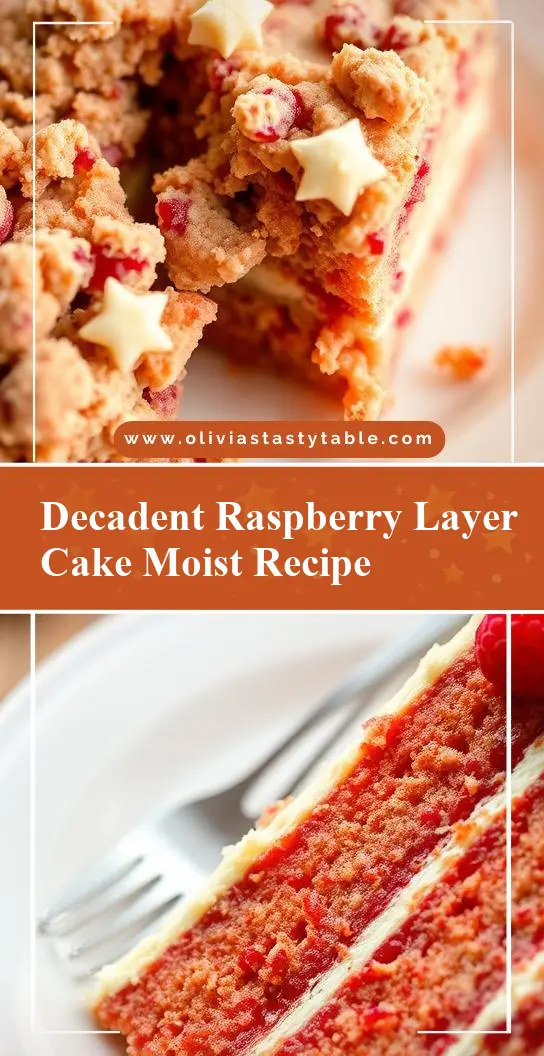
Welcome to the world of decadent desserts with our show-stopping Raspberry Layer Cake Recipe! This masterpiece is not only a feast for the eyes, but it’s also surprisingly easy to make, requiring just a few everyday ingredients and some basic kitchen tools. The combination of moist cake layers, tart raspberry filling, and creamy frosting will leave your taste buds dancing and your guests begging for more. Whether you’re a seasoned baker or a novice in the kitchen, this recipe is perfect for anyone looking to impress with minimal effort. So, let’s dive in and explore the magic behind this decadent dessert!
Why This Works
- Flavor balance and ingredient accessibility: The perfect blend of sweet and tart flavors, combined with easily accessible ingredients, makes this cake a winner.
- Ease of preparation: Despite its impressive appearance, this cake is surprisingly easy to prepare, with each component requiring minimal effort and expertise.
- Impressive results with minimal effort: The layering of flavors and textures creates a visually stunning dessert that’s sure to impress, without requiring hours of intricate decorating or complicated techniques.
Key Ingredients
The star of the show is, of course, the raspberries, which provide a sweet-tart flavor and a beautiful pop of color. You’ll also need all-purpose flour, granulated sugar, unsalted butter, eggs, and whole milk to create the moist and fluffy cake layers. For the frosting, you’ll need cream cheese, unsalted butter, and powdered sugar. If you want to get creative, you can substitute the raspberries with other berries, such as strawberries or blueberries, or use different types of milk, like almond or soy milk, to cater to dietary restrictions.
Instructions
- Step 1: Begin by preheating your oven to 350°F (180°C) and preparing your cake pans. Chop the raspberries and set them aside, then measure out the dry ingredients, including flour, sugar, and baking powder.
- Step 2: In a large mixing bowl, whisk together the dry ingredients, then add in the unsalted butter, eggs, and whole milk. Mix until a smooth batter forms, then gently fold in the chopped raspberries.
- Step 3: Divide the batter evenly among the prepared pans and bake for 20-25 minutes, or until a toothpick inserted into the center comes out clean. Allow the cakes to cool completely before assembling the layer cake.
- Step 4: To assemble the cake, place one of the cooled cake layers on a serving plate, then spread a layer of raspberry jam or preserves on top. Repeat this process with the remaining cake layers, finishing with a layer of cream cheese frosting on top. Decorate with fresh raspberries and a sprinkle of powdered sugar, if desired.
Handy Tips
- Make sure to not overmix the batter, as this can result in a dense and tough cake. Instead, gently fold in the ingredients until just combined.
- If using frozen raspberries, be sure to thaw and pat dry with paper towels before using to prevent excess moisture in the cake.
- To ensure the cake layers are evenly sized, use a digital scale to measure the batter as you divide it among the pans.
Heat Control
When baking the cake layers, it’s essential to keep an eye on the temperature and timing to ensure they’re cooked to perfection. The ideal temperature is 350°F (180°C), and the cakes should be baked for 20-25 minutes, or until a toothpick inserted into the center comes out clean. If you’re unsure, check the cakes after 18 minutes and every 2 minutes thereafter until they’re done. A perfectly baked cake will be golden brown on the outside and tender on the inside, with a slight spring to the touch.
Crunch Factor
The texture of this cake is all about balance – you want the cake layers to be moist and tender, while the frosting provides a creamy and smooth contrast. To achieve this, make sure to not overbake the cake layers, and don’t overmix the frosting, as this can result in a dense and stiff texture. If you want to add some crunch to the cake, you can sprinkle some chopped nuts or shredded coconut on top of the frosting before serving.
Pro Kitchen Tricks
- To ensure the cake layers are evenly sized and baked, use a digital scale to measure the batter as you divide it among the pans, and rotate the pans halfway through the baking time.
- To prevent the cake from becoming too dense, make sure to not overmix the batter, and use room temperature ingredients, including eggs and butter.
- To achieve a smooth and creamy frosting, make sure to soften the cream cheese and butter to room temperature before mixing, and use a high-quality powdered sugar that’s fresh and not lumpy.
Storage Tips
- The cake can be stored at room temperature for up to 2 days, or wrapped tightly in plastic wrap and frozen for up to 2 months. When freezing, it’s best to freeze the cake layers separately, then assemble and frost the cake just before serving.
- If you need to reheat the cake, you can do so by wrapping it tightly in foil and heating it in a low-temperature oven (around 200°F or 90°C) for about 10-15 minutes, or until warmed through.
- When storing leftovers, make sure to keep the cake in an airtight container, such as a glass or plastic container with a tight-fitting lid, to prevent it from drying out or absorbing odors from other foods.
Gift Packaging Ideas
This cake is perfect for gifting, whether it’s for a birthday, anniversary, or just a thoughtful gesture. To package the cake, you can use a sturdy cake box or a decorative tin, lined with parchment paper or a silicone mat to prevent the cake from sticking. You can also add a personal touch by including a handwritten note or a small gift, such as a bag of gourmet coffee or a box of chocolates. If you want to get creative, you can decorate the cake with fresh flowers or greenery, or use a decorative cake stand or pedestal to add a touch of elegance.
Flavor Variations
- 🌟 Different spices: Try adding a pinch of cinnamon, nutmeg, or cardamom to the cake batter for a unique flavor twist.
- 🌟 Creative toppings: Instead of using fresh raspberries, try using other berries, such as strawberries or blueberries, or even diced peaches or apricots.
- 🌟 Ingredient swaps: If you’re looking for a gluten-free option, try substituting the all-purpose flour with almond flour or coconut flour. You can also use different types of milk, such as almond or soy milk, to cater to dietary restrictions.
Troubleshooting
- Texture problems: If the cake is too dense or dry, it may be due to overmixing the batter or overbaking the cake layers. Try adjusting the mixing time or baking temperature to achieve a lighter texture.
- Ingredient replacements: If you’re missing an ingredient, try substituting it with a similar ingredient. For example, you can use Greek yogurt instead of sour cream, or honey instead of granulated sugar.
- Over/undercooking signs: If the cake is overcooked, it may be dry and crumbly. If it’s undercooked, it may be raw and soggy. Check the cake frequently during the baking time, and adjust the temperature or baking time as needed.
FAQs
- Can I freeze it? Yes, the cake can be frozen for up to 2 months. It’s best to freeze the cake layers separately, then assemble and frost the cake just before serving.
- Is it gluten-free? No, this recipe uses all-purpose flour, which contains gluten. However, you can try substituting the flour with a gluten-free flour blend to make the cake gluten-free.
- Can I double the recipe? Yes, you can double the recipe to make a larger cake. Just keep in mind that you may need to adjust the baking time and temperature to ensure the cake is cooked through.
Conclusion
And there you have it – a decadent Raspberry Layer Cake Recipe that’s sure to impress your friends and family. With its moist and tender cake layers, tart raspberry filling, and creamy frosting, this cake is a true showstopper. Whether you’re a seasoned baker or a novice in the kitchen, this recipe is perfect for anyone looking to create a stunning dessert with minimal effort. So go ahead, get creative, and enjoy the oohs and aahs as you present this masterpiece to your loved ones!